A valet key? OAuth 2.0 Delegated Authorization in Node.js
How to implement OAuth 2.0 in Node.js with Spotify using the Authorization code flow.
What is Delegated Authorization?
First things first, Delegated Authorization is all about granting access to perform some task on your behalf.
Consider a valet key, you hand a valet parking attendant a valet key to park and retrieve your car on your behalf. Valet keys typically unlock the driver’s door and start the car but can’t unlock the trunk or the glove box.
For an application to perform such tasks, for instance make API requests in order to perform actions(read and write) on user’s resources(in another application), they need to be authorized by the user to perform only a set of actions on the user’s behalf.
OAuth is a delegation framework that enables all the parties involved to orchestrate such a process.
OAuth 2.0 in Node.js
Setup your node.js environment and have your server running using the framework of your choice.
We’ll be using Spotify as an example to show the OAuth 2.0 authorization code flow in node.js.
You can check out the final application here
Step 1: Client registration and configuration
From the specification, a client is an application making protected resource requests on behalf of the resource owner (end-user) with its authorization. To register an application you need to provide the information required by the authorization server. This will vary depending on the service provider. With Spotify some of the information includes application name, description, website, Redirect URL.
After registering an application you are presented with a client ID and client secret. Save the client ID and client Secret in a .env file.
1 | Client_id="your client_id" # |
A client ID is a unique identifier and a client secret is used to authenticate the client with the authorization server.
In the app.js create an object to encapsulate the client details (client_id and client_secret). Use the dotenv module to load the environment variables. To install the module, run npm install dotenv.
1 | require('dotenv').config() |
The redirect_uri is the endpoint URL that the authorization server redirects the user-agent back to the client with (previously used in client registration) after the resource owner grants or denies permission to your client.
Step 2: Send an authorization request
You need to include a link that initiates the process and also inform the user what service they are about to access. For instance, View your Spotify activity. This is done by sending the client to the authorization endpoint of the authorization server. The authorization endpoint can be found on the authorization guide.
Next, configure the authorization server details; just like the client details, enclose the details in an object.
1 | const authProvider = { |
From the specification, the authorization endpoint is used to interact with the resource owner and obtain an authorization grant. The token endpoint is used by the client to obtain an access token by providing its authorization grant or refresh tokens.
To send the user to the authorization endpoint, you need the authorization endpoint URL and a few concatenated URL query parameters:
Client ID
The client id obtained after client registration.
response_type
code indicates the type of response returned.
redirect_url
The URI to redirect to after the user grants or denies permission to your client. We included it in the client’s config object.
scope
This refers to the information the client wants to access the resource server.
state
A random non-guessable string used to protect against cross-site request forgery(CSRF) attacks.
To build the url with all the queries you can use the build-url library;a library that builds URLs. To install run npm install build-url –save.
1 | const buildUrl = require('build-url'); |
First, we pass the authorization endpoint as the first argument of the buildUrl function followed by the query parameters. The queryParams object is self-explanatory, except the state and scope maybe. The scope “user-top-read” from the Spotify guide gives access to a user’s top artists and tracks.
So what is the state query parameter?
From the specification;
The client MUST implement CSRF protection for its redirection URI. ………The binding value used for CSRF protection MUST contain a non-guessable value
There is no specification on how to generate the non-guessable value. We can use the node.js crypto module to genetrate the random string to be used as state.
1 | const crypto = require('crypto'); |
The state parameter is returned in the response callback and thus has to be compared with the one in the client, we therefore need to store it somewhere. We could store in session strorage. To use session storage we need express-session middleware. To install run the command npm install express-session.
1 | const session = require('express-session'); |
Send the request to the authorization endpoint.
1 | app.get('/authorize', (req, res) => { |
The user initiates the process by clicking the authorize link, they are redirected to the service provider’s authorization endpoint where they authenticate themselves first(if not already authenticated), they are then presented with the scopes; information that the client will have access to and whether they agree to grant the client access or not. Whether they agree or not the user is redirected back to the client with the redirect URL.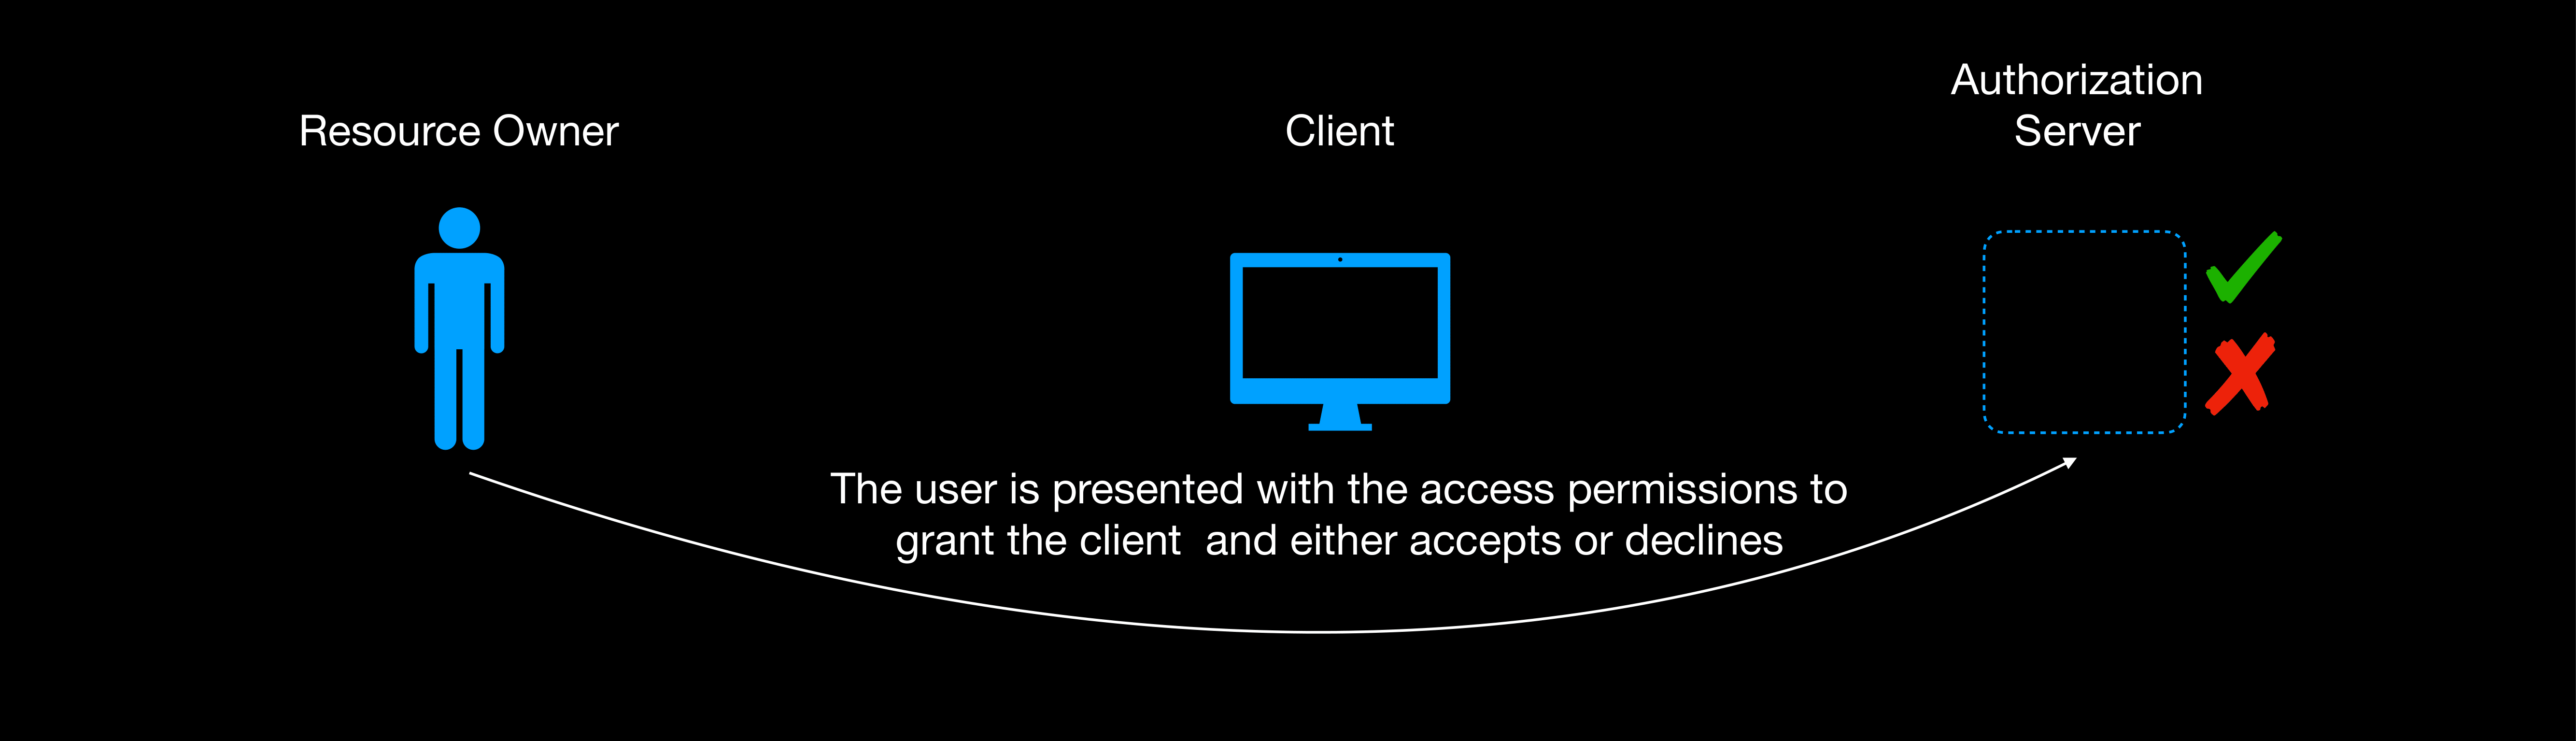
Step 3: Exchanging the authorization code for an access token
If the user grants the client access, the redirect URL contains the code and the state query parameters. If they deny the client access, the redirect URL contains the error parameter with a description why the authorization failed i.e access_denied.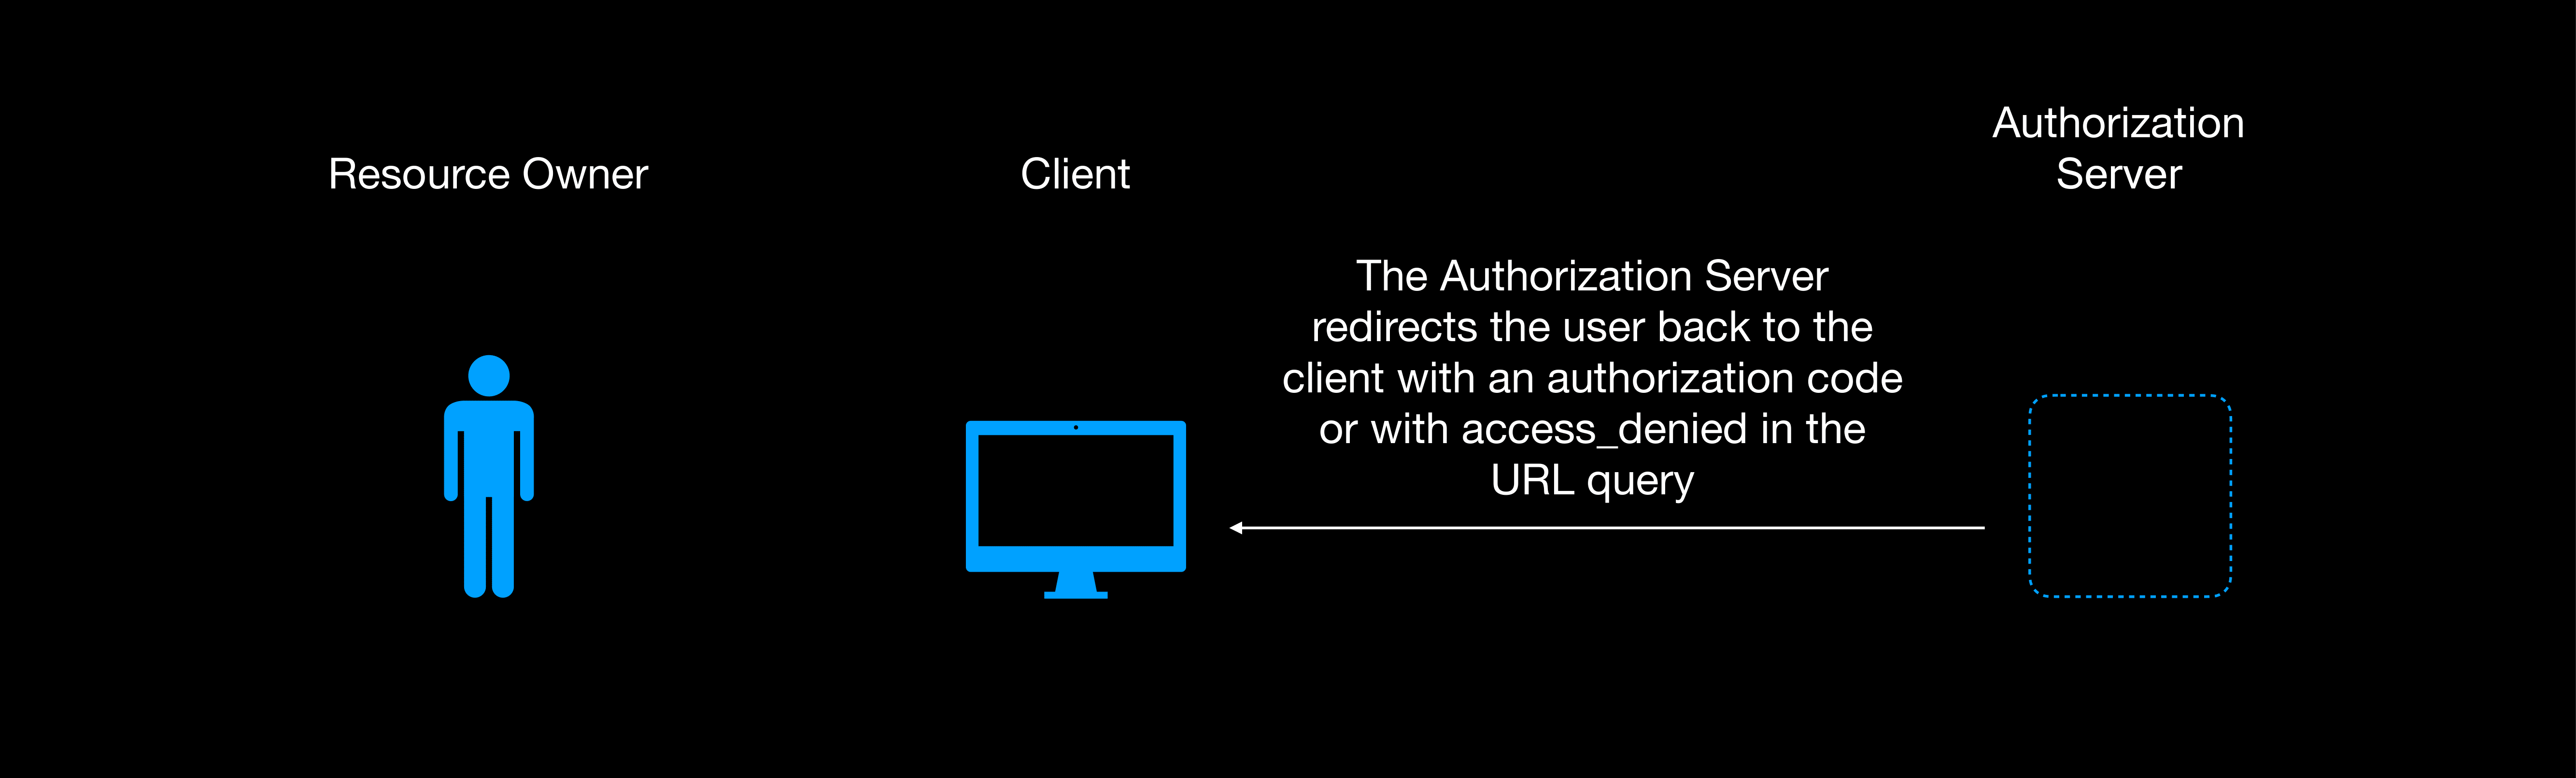
At this point the client extracts the state parameter and compares it with the session state and if they don’t match the client doesn’t continue with the processing.
1 | if(req.query.state !== req.session.state) { |
If they match the client extracts the code and exchanges it for the access token via a post request to the authorization server token endpoint.
1 | const code = req.query.code; |
We’ve used http basic to authenticate the client; the client_id as the username and client_secret as the password encoded in Base64.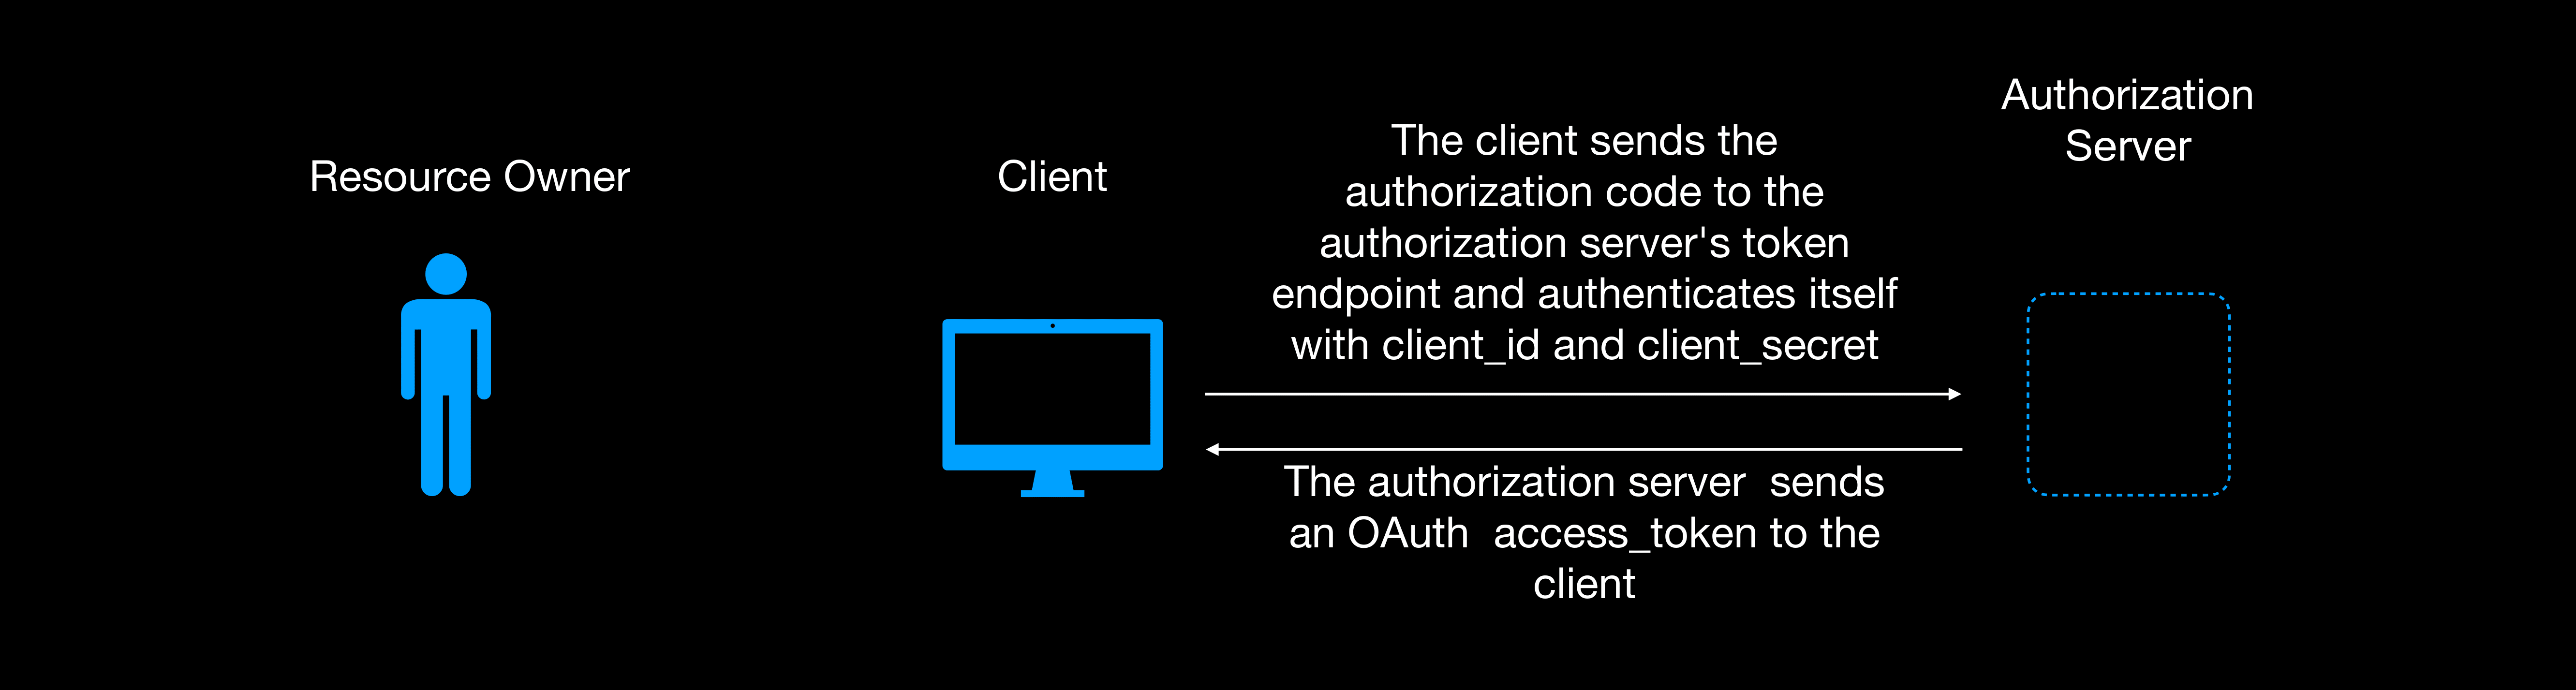
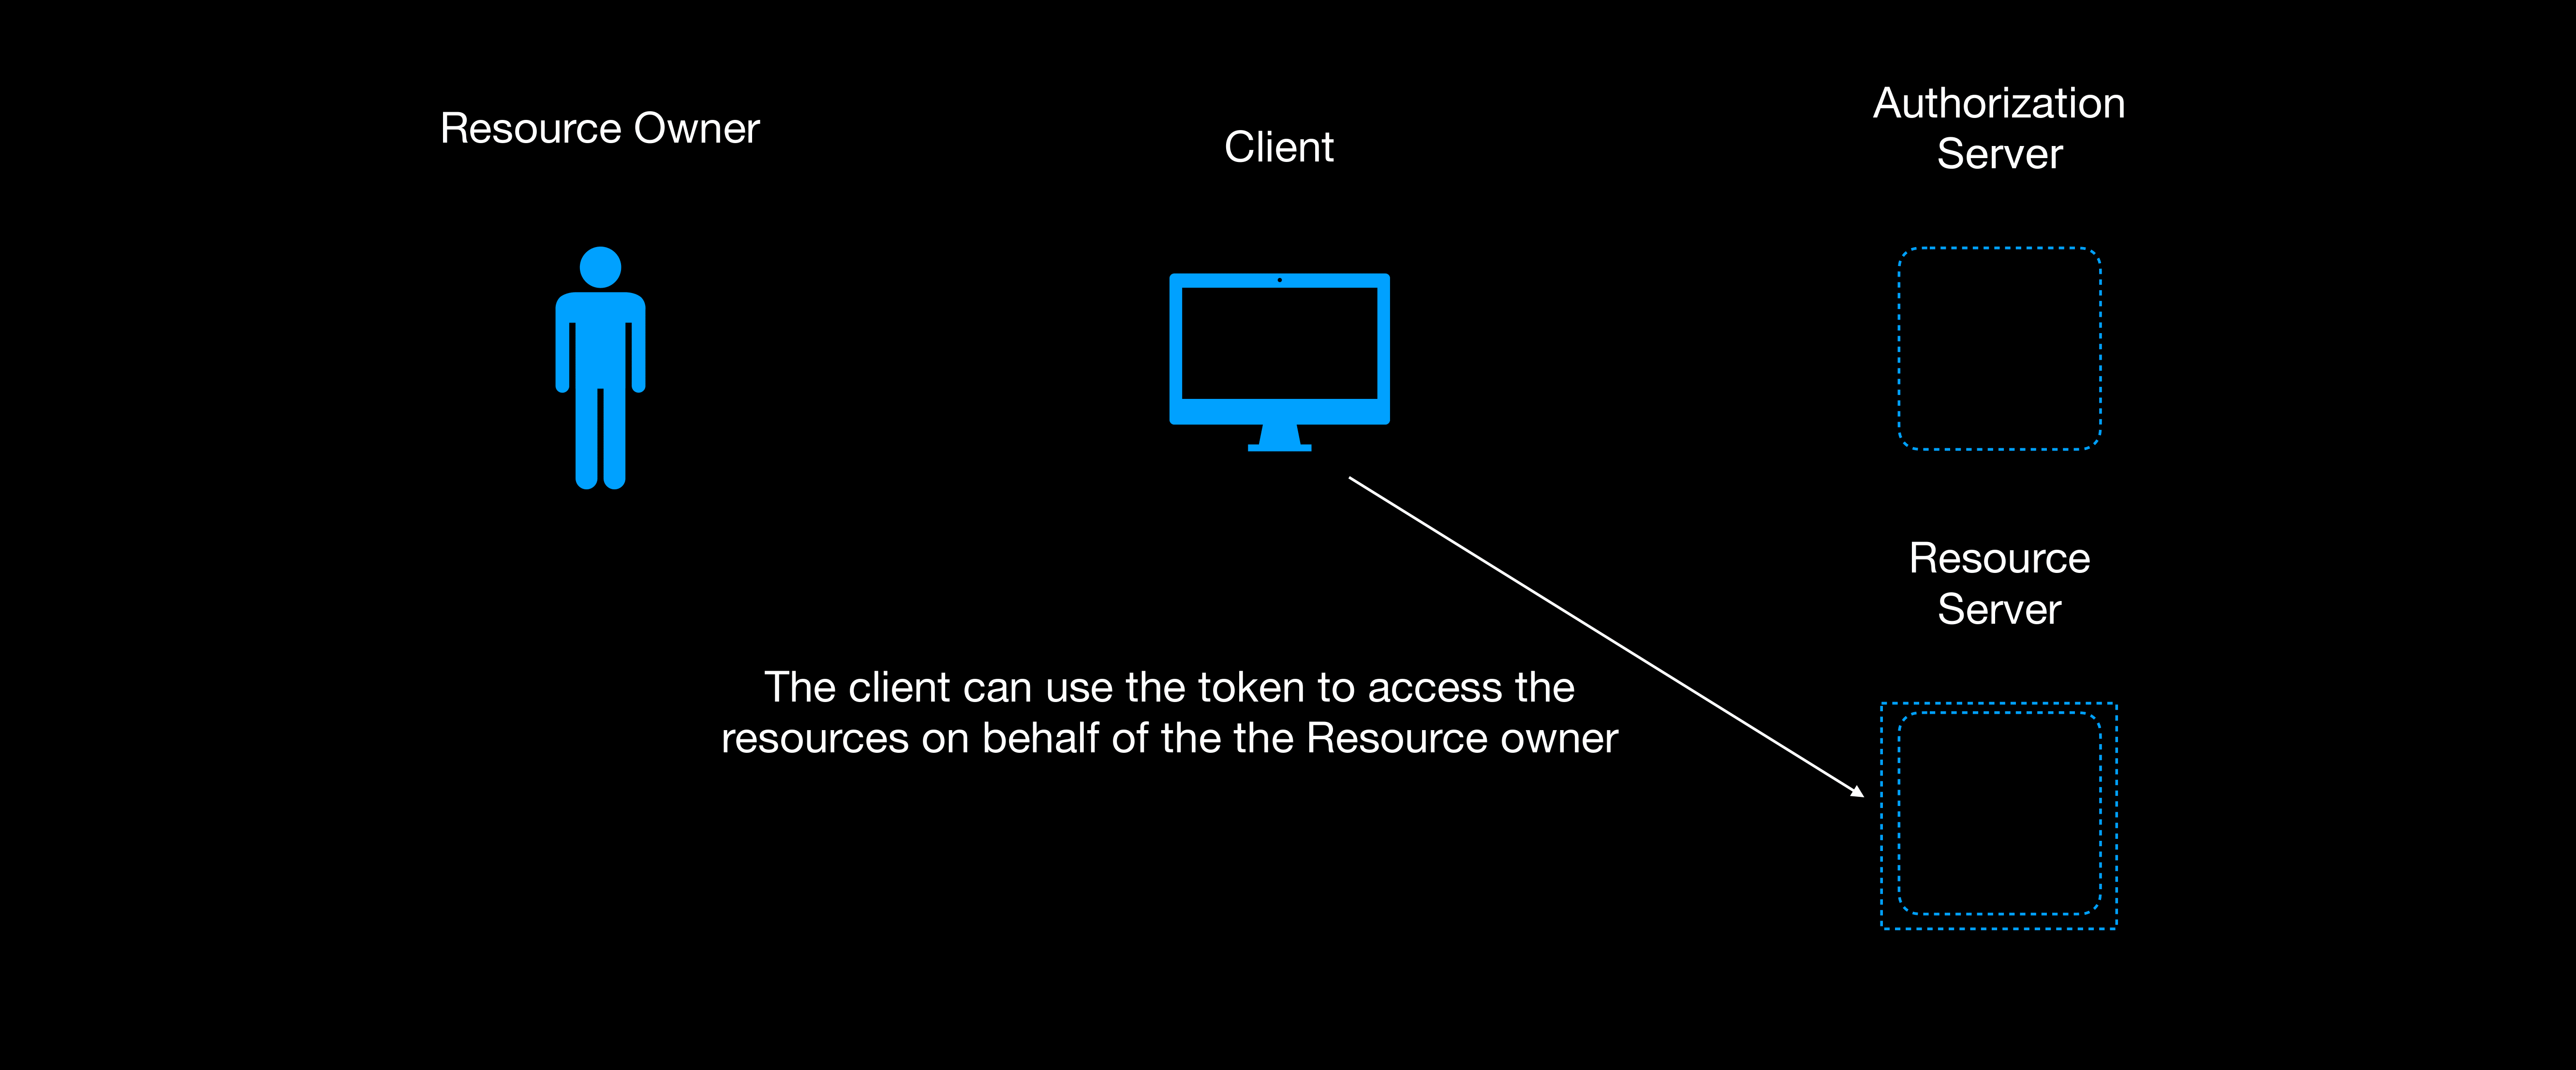
Step 4: Accessing user’s resources
At this point you have the access_token. You can then use the access token to access the user’s resources using the resource server API endpoints.
1 | const fetch_lists = async () => { |
Conclusion
That’s the gist of OAuth 2.0, You can check out the source code on Github